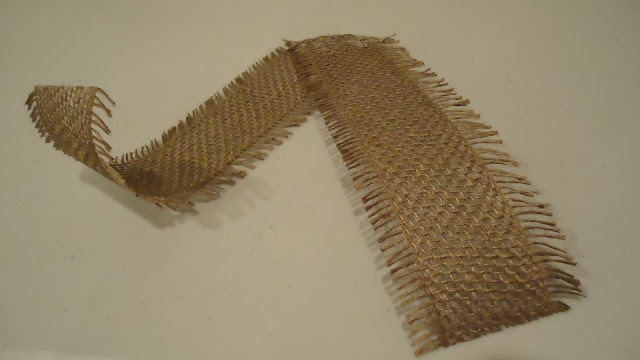
I'm a procrastinator. I always wait until the very last minute to do things, and when my friend's birthday party rolled around, I waited until the night before to even think about what I would do for a present. So I hit up the nearest Walmart for some inspiration and was struck by an idea. Why buy a present when I can make one? So I filled my cart with some chocolates, burlap ribbon, and this cute vase that says, "Live, Laugh, Love" on it. Once home, I busted out my glue gun and got to work.
- Hot glue gun
- Hot glue sticks
- Burlap Ribbon
- Glass Vase
- Chocolate
- Sheet Music/ Book Pages
- Scissors
- Wire
- Brown yarn
I started off by preparing the vase itself. To make the burlap bow, I cut 3 strips of ribbon, each different sizes: 5, 11, and 17 inches.
I then proceeded to form a circle with the medium length strip, using some hot glue to keep it in place.
I then took the long piece and folded it in half, then spread out the bottoms and used glue to secure the fold. At this point, you can cut little V's at the base of the ribbon to make it seem more clean.
After that, I flattened the round piece and stuck it to the folded piece, securing with hot glue. I then folded the small piece in half lengthwise and wrapped it around the two in the middle, securing with more hot glue in the back to finish the ribbon. I then glued the whole thing to the vase, careful not to cover the words.
Once that was done, I began to print out my friend's favorite songs ("Hysteria" by Def Leppard and "Kickstart My Heart" by the Motley Crue), and pages from her favorite book, Gone With the Wind.
To give them an aged look, I took some leftover coffee from the pot and poured it into a rimmed baking sheet. I then dipped the pages in there and let them sit for about 10 to 20 minutes as I preheated the oven to 350 degrees.
After they had been sitting in the coffee, I took them out and moved them to another pan, which I then put into the oven for about 5-10 minutes, until the paper was completely dry. I repeated this process until all the papers had a nice aged look to them.
To make the roses, I began by cutting the paper into sets of three squares in two sizes, 3x3in and 5x5in. I tried to make at least one large square for each song and book, to add some variety.
I then folded the squares in half and in half again, to form smaller squares.
Then I folded the squares into triangles, making sure one of the corners contained only folded sections, and drew a flower petal in pencil as an outline. Make sure to draw a line at the base of the triangle, so that there will be a hole at the center of the flower.
Once I cut and unfolded the triangles, I ended up with this:
I then cut one petal out of one flower, two out of another flower, and three out of the last flower.
I used the hot glue to glue the all the pieces with three or more petals together, and ended up with this:
Then I rolled the tips of each petal backwards, to give a more natural appearance:
After that, I rolled the one petal piece into a cylinder and glued it into the two petal piece, which I rolled into a cone. I glued that ensemble into the three petal piece, then the four peal piece, and so on until I had all the pieces glued together.
I repeated these steps for the rest of the flowers, and glued 13" strips of wire into the bottom for the stem.
I then got some brown yarn and wrapped it around the stems until the wire was fully concealed, and used glue to secure it in place.
I collected the roses into a bouquet and tied them together to keep them securely in place. I then placed them in the vase and filled it with the chocolates to finish off.
I love how these roses look so real, yet they smell like coffee. Where can you get roses that smell like coffee? Certainly not at the store. Needless to say, it's always better to give a gift that's sentimental to a person that to just get a gift card to Starbucks.


No comments:
Post a Comment